The big job this winter is #7 "Titivate the tender" - a major suite of fixes to the new to me tender I got half way through the year.. this was, and remains, a major bonus to me as she is far more stable and capacious than the old one so is well worth the time and money to fix a few of the major issues..
First job though was to get her home - much easier to work on in my garage than at the club..
 |
| ...the other job is at the very front of the keel where again we see a hole, this time due to years of grounding on the concrete ramps we have round here.. |
 |
| Better view of the two main issues mentioned above.. |
Once in the garage work started straight away... the nose is all but complete... apologies was so keen to get on with it I didn't take a before picture, but this is after the second day -
- rubbed/sanded down
- hole filled with two pack plastic wood
- rubbed/sanded down again
- cleaned with acetone
- two layers of woven rovings wetted with epoxy (yeah I know, overkill, for this job ordinary GRP would do but I'm used to, and already had, some epoxy, and also had the cloth from an old job so went with it)
- rubbed/sanded down again
- I had some steel bar in my spares box, cut off about 9", tried to and largely failed to drill a couple of holes of the right size - I went with pilot holes but it took a LONG time to drill - Heaven only knows what this stuff actually is. Either way got a couple on the end, then pre bent the end to fit the contour of the nose. Nailed this into the keel, and then bedded it in with more epoxy this time stiffened up with some micro ballons to the consistency of lemon curd..
- rubbed/sanded down again
These following are post step 5/. and pre 6/.
....and this one is step 7/. - the strip is intended to be sacrificial to stop grounding issues going forward.. should last a while!😏 Need to rub it sown again and then we'll see whether I out one final coat of epoxy on, or just call it done..
....rear of the keel is not so advanced... I want some lighter cloth for this (that's on it's way) as the curves are complex and a lighter cloth will conform more easily but basically the plan is the same as above with the exception of the metal bar, which for this application doesn't require a curve, so allows me to use a fairly solid offcut of aluminium plate - much easier to drill..
Following then are mid step 5/.
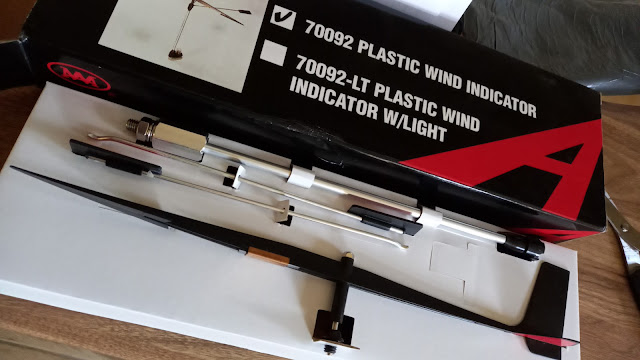
Elsewhere on the job list - #11 "Source/fit new Windex.." is half done - got a bargain online.. same windex I had previously so it's a straight swap, but I'll do it last thing before launch, or even on the water just before putting the mast up
..but on the regular job list #6 "Service Life Jackets" is complete, but not without the usual stupidity/real life intrusions.. 😏
So just to close this one out with what is hopefully a laugh here's the sorry tale.. so there I am, the jackets unzipped and folded out, unscrew the bottles and weigh them to make sure they're within tolerance of previous year(s) - all good - I then go to screw the bottles bottle back in, to leave for the 24 hour inflation test. What I didn't spot was that on the first one, where I had been manhandling the jacket to blow it up, the striker arm on the firer (a Halkey Roberts) was down, as the yellow ball on the end of the trigger rope was caught behind one of the straps... cue hissssssssssssssssssssss as it pierced the bottle as I screwed it back in... buggering thing was the new one I bought last year as well!! 😂
 |
| Trigger on the right - gas bottle screws into that hole - in the centre of the hole is the spike on the bottom of the trigger arm - recessed here as the trigger is in the up position.. |
Now replaced, and both jackets are online and ready for the new season..
At some time I really need to think about replacing them I guess, they are Remploy Commodore II manual inflatable life jackets... no longer made and the label in the sleeve of the vest says they were made in March 1997 - 27 years old... most people wouldn't think twice, but I have serviced them every single year, the bladders and covers are good, the bottles are fresh/new, and with very few moving parts I trust them implicitly.. I hate waste, but they are old.. 😏
Postscript - if my stupidity wasn't enough this year, I also found out I've done it before [clicky].. DOH!!


